Create Form with Validation in Saasio
Creating a form with validation in Saasio is a simple yet powerful process. This guide will walk you through the steps to create a form, define its schema, and implement field-level validations with detailed error messages.
Step 1: Define a Form Schema
Access the Data Tab
- Navigate to the Data tab in the Saasio editor.
- Select the Form Schemas tab to manage your form's schema.
Create a New Schema
- Click on Add Schema to define the structure of your form.
- For example, if your form has fields for Name, Age, and Birth Date, add these fields to the schema.
Configure Each Field
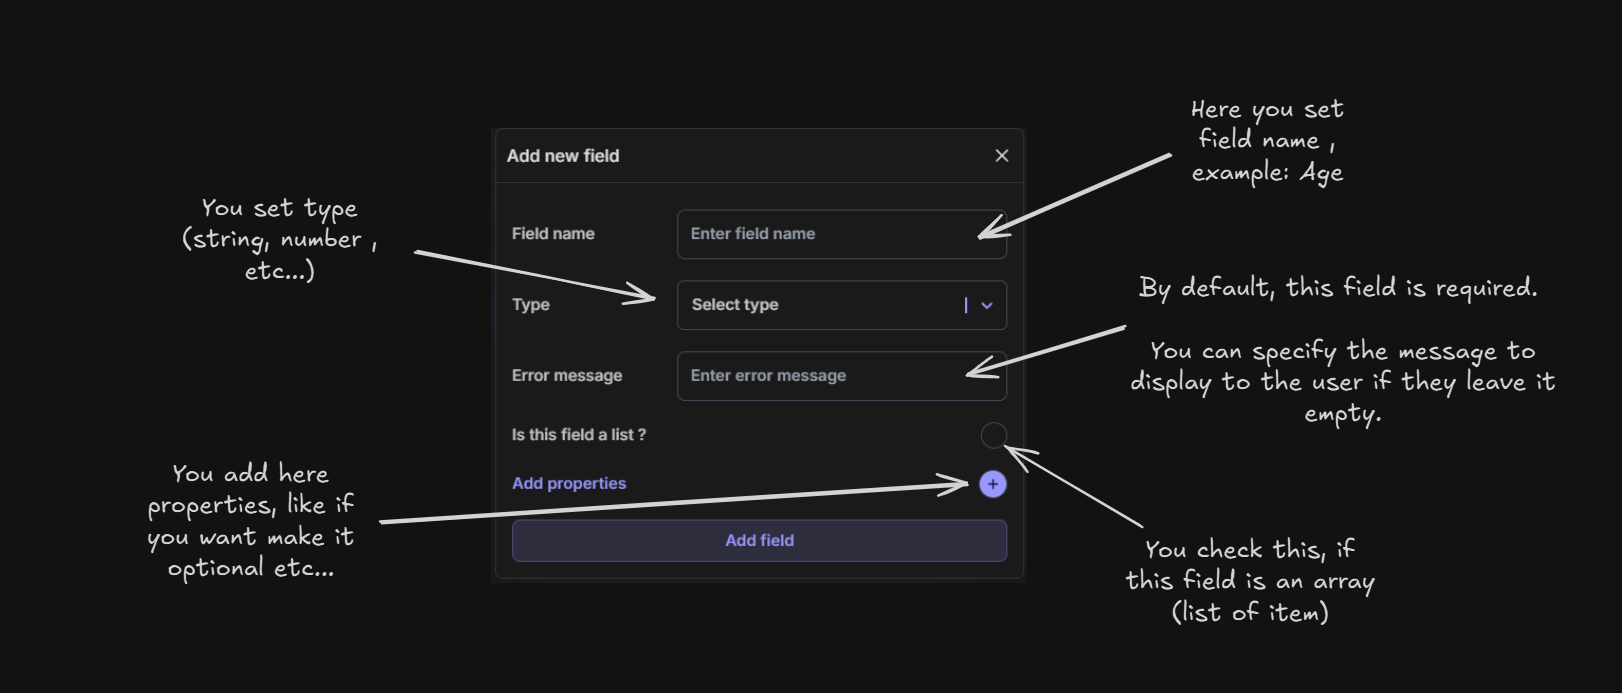
- For each field in the schema, specify:
- Type: The data type of the field (e.g., string (text), number, date).
- Validation Rules:
- Required: Indicate if the field is mandatory.
- Error Message: Provide a custom message that will display if the validation fails.
- Additional properties, such as min/max length for text or min/max values for numbers, can also be configured.
Step 2: Add a Form Element to the Editor
Insert the Form
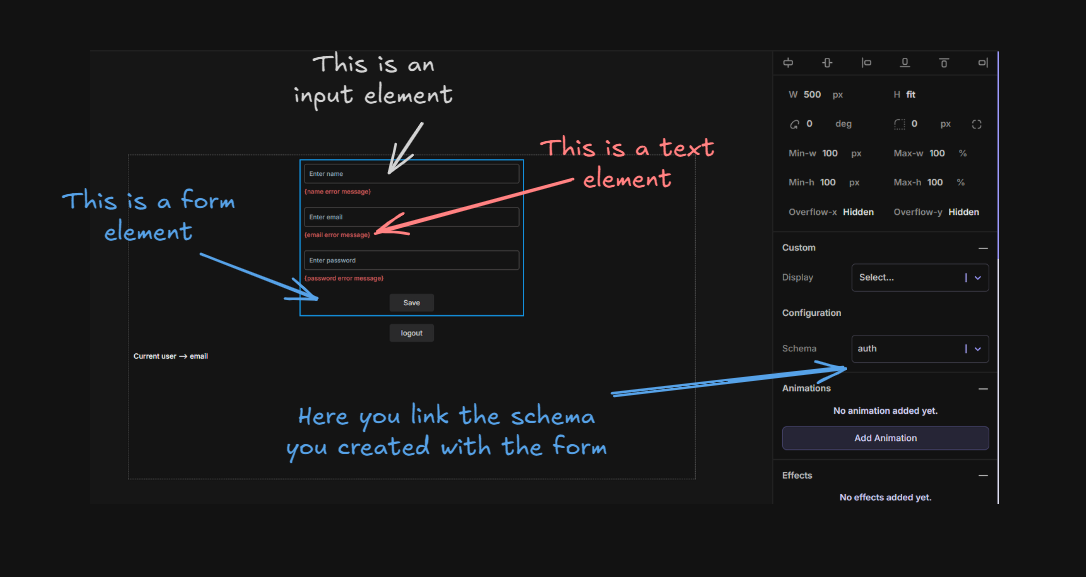
- In the Saasio editor, drag and drop a Form element onto the canvas.
- Select the form and open the Custom section in the right sidebar.
Link the Form to the Schema
- In the Custom section, choose the schema you created earlier to connect it to the form.
- This step ensures that the form fields and validations are associated with your defined schema.
Step 3: Add Input Fields and Link Them to Schema Fields
Insert Input Fields
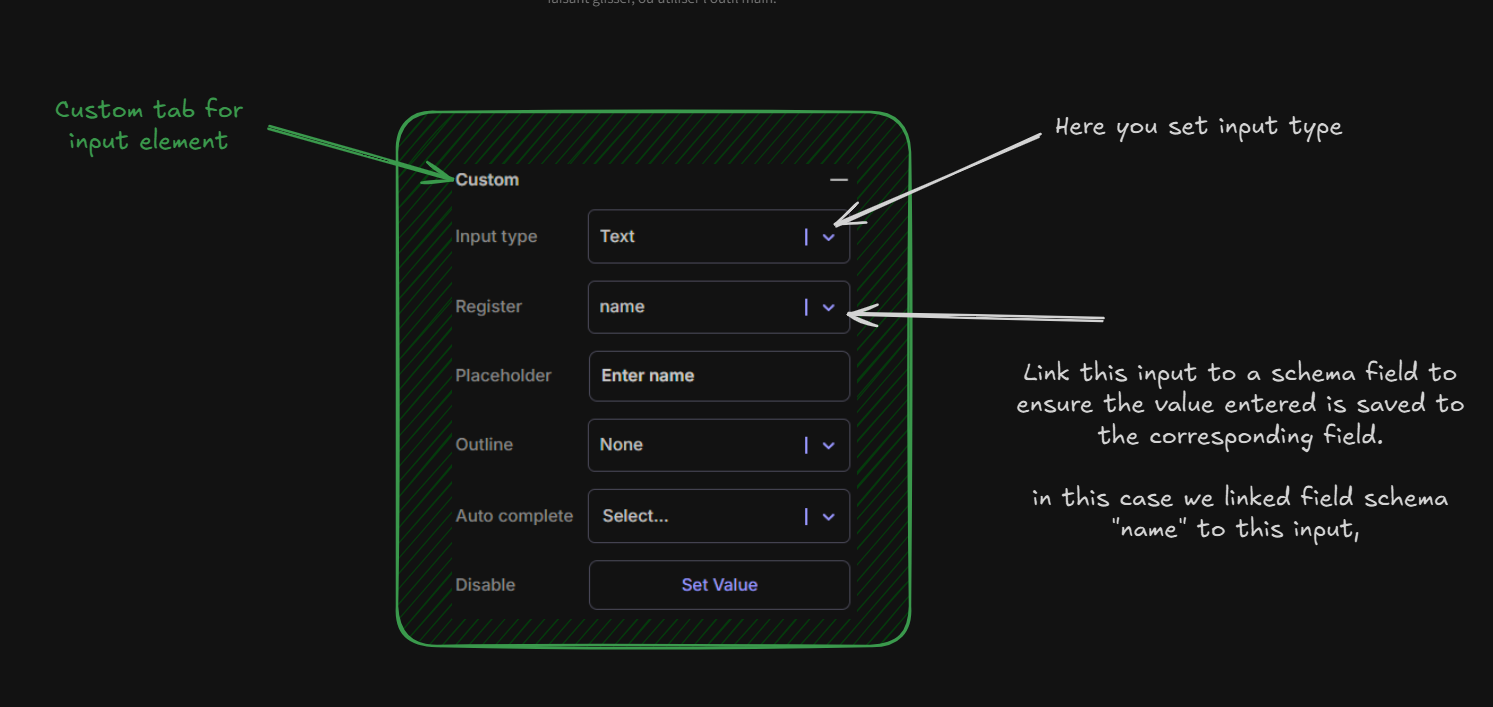
- Drag and drop the appropriate Input elements (e.g., text input, date picker, number input) for each field in the schema.
for field schema type number , you must set input type number not text.
Link Inputs to Fields
- Select each input element and use the Field dropdown in the right sidebar to link it to the corresponding field in the schema (e.g., link the "Name" input to the "Name" field in the schema).
Step 4: Display Validation Errors
Insert a Text Element
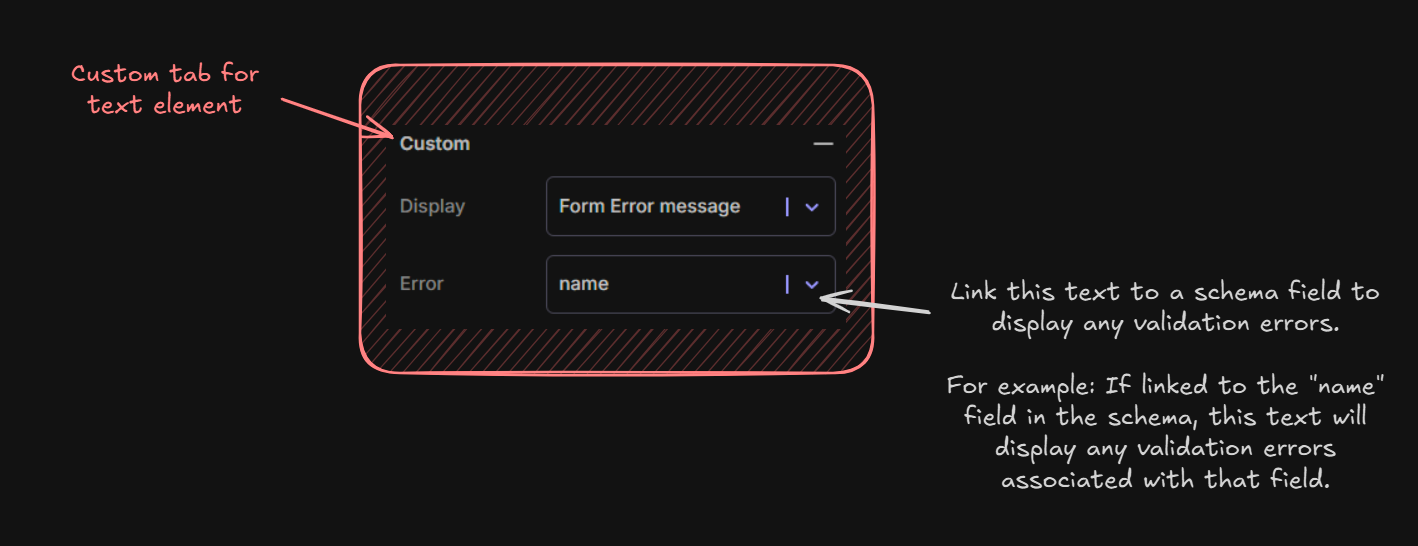
- Drag a Text element into the form to display error messages for specific fields.
Link the Text Element to a Field's Error Message
- Select the text element and link it to the desired field's error message property in the schema.
- This ensures that whenever validation fails, the corresponding error message will appear.
Step 5: Test the Form
Preview the Form
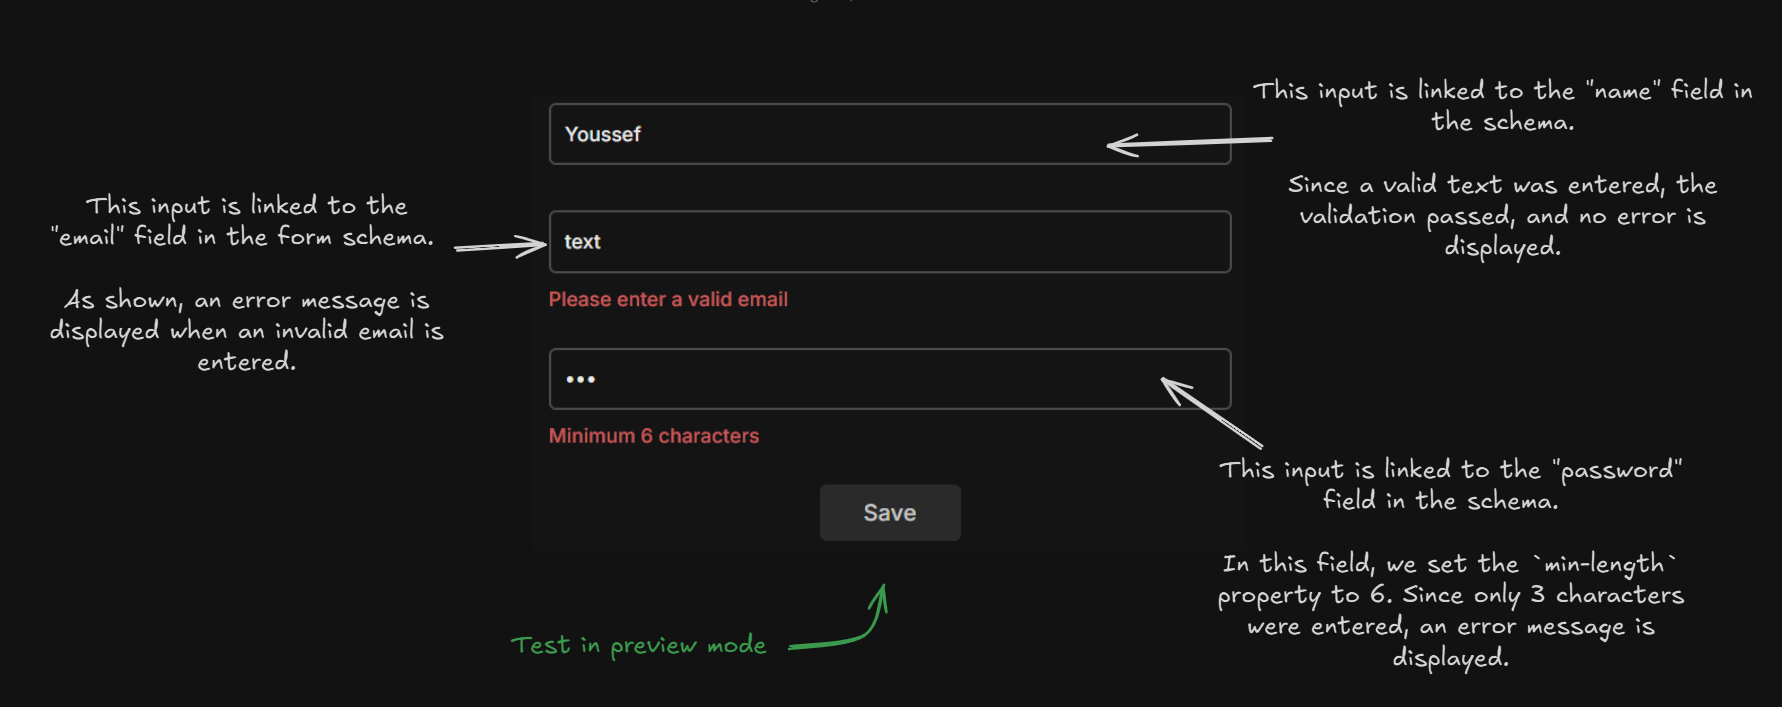
- Test the form in the Saasio preview mode to ensure all validations work as expected.
- Try submitting the form without filling in required fields or entering invalid data to verify that the error messages display correctly.
Key Features of Form Validation in Saasio
- Custom Error Messages: Provide user-friendly feedback for each field.
- Flexible Field Types: Support for text, numbers, dates, and more.
- Seamless Integration: Link forms and fields directly to schemas for a smooth setup.
By following these steps, you can create robust forms with validations that enhance the user experience and ensure data integrity.